
August 15, 2026
Kitchen Cabinet Lighting for Charlotte Homes: Under-Cabinet, In-Cabinet & Toe-Kick
Quick Answer
Use continuous LED strip under wall cabinets for task light, in-cabinet lighting only behind glass doors, and toe-kick lighting as a low-level night light. Choose 2700K-3000K to match warm cabinet finishes, put every layer on its own dimmer, and specify a high CRI (90+) so food and finishes look right. Budget roughly $800-$2,500 installed for a typical Charlotte kitchen. Decide all of this before cabinets are built – the wiring channels are cut in the shop.
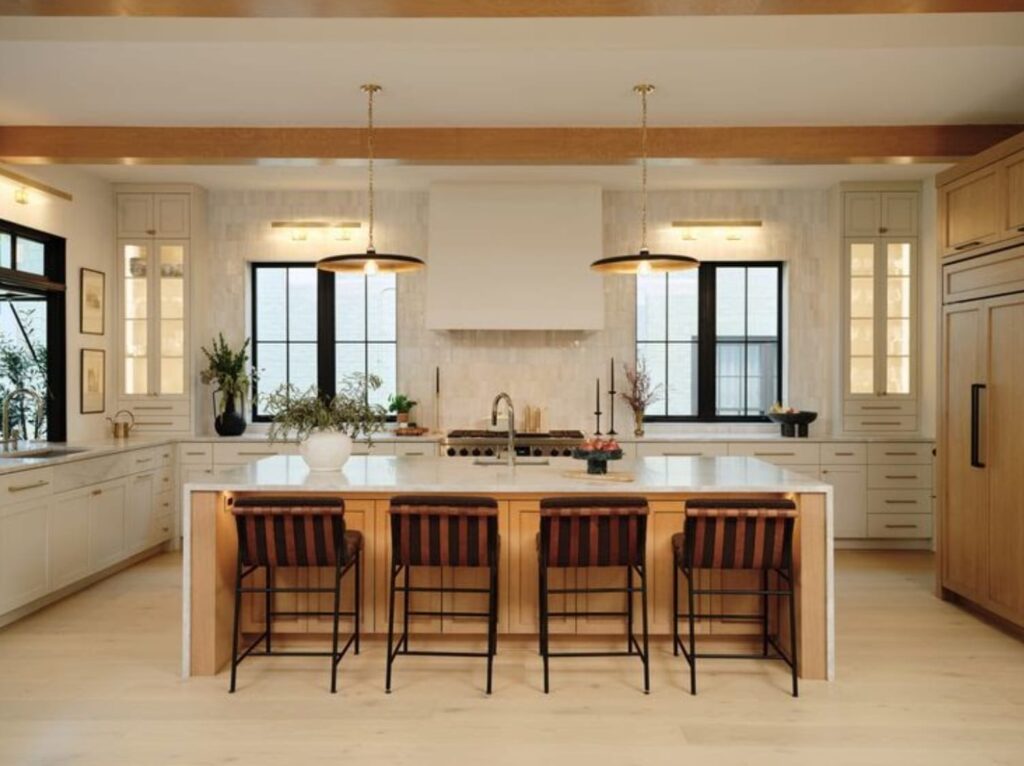
Cabinet lighting is the detail that separates a kitchen that looks finished from one that looks nearly finished. It is also the detail most often left until too late – by which point the cabinets are built, the channels are not routed, and the only options left are compromises.
Here is what each layer does, what to specify, and why the decision belongs at the design stage rather than the shopping stage.
The Three Layers
In-cabinet lighting is display light. Inside glass-front uppers it turns cabinetry into a feature after dark.
Toe-kick lighting is ambient light. A low strip at floor level that acts as a night light and gives the kitchen a soft glow when nothing else is on.
Most kitchens need the first. The second is worth it only in specific places. The third is cheap to add during a build and disproportionately liked afterwards.
Under-Cabinet: Strip, Not Puck
LED strip tape runs continuously along the cabinet underside, recessed into a routed channel with a frosted diffuser over it. The light is even from end to end, the diodes are invisible, and there is no glare from a seated position.
Puck lights are individual round fixtures spaced along the run. They are cheaper and simpler to fit, and they produce a row of bright circles with dark gaps between them – visible as scallops on the backsplash. If you have ever seen an under-cabinet installation and thought it looked dated, this is almost always why.
Two details that matter as much as the fixture:
– Always use a diffuser channel. Bare tape shows individual diodes as a row of dots in any reflective surface – quartz, glass, or a gloss finish.
Colour Temperature: 2700K to 3000K
Colour temperature is measured in Kelvin. Lower is warmer.
– 2700K – warm. Right for white oak, walnut, cream, greige, and mushroom finishes.
– 3000K – neutral warm. Right for white, dove, and cooler grey cabinetry.
– 4000K and above – cool and clinical. It fights every warm palette that is current in 2026 and makes wood look grey.
CRI: The Spec Nobody Asks About
Cheap LED strip is often CRI 80 or lower. Under it, wood grain flattens, painted finishes lose depth, and raw meat and vegetables look grey – which matters in the one room where you judge food by eye.
Specify CRI 90 or higher. The cost difference is small and it is the difference between cabinetry that looks like the showroom sample and cabinetry that looks slightly wrong without anyone being able to say why.
Dimming and Switching
Three practical rules:
– Each layer on its own switch. Task light at full output while you cook; display and toe-kick at low level in the evening. One combined switch forces a permanent compromise.
– Check driver and dimmer compatibility. Most LED flicker and buzz complaints are a mismatched dimmer, not a faulty strip. The driver and the dimmer must be specified as a pair.
– Consider a motion sensor on the toe-kick. It is the layer you want at 2am and never want to think about switching.
Why This Has to Be Decided Before the Cabinets Are Built
This is the part homeowners are rarely told.
Recessed channels for strip lighting are routed into the cabinet during production. Pass-through holes for wiring between cabinet boxes are drilled in the shop. Power locations have to be agreed with the electrician before the backsplash goes on.
Decide during design and all of it is invisible – no surface channels, no visible cable, no trunking. Decide afterwards and you are surface-mounting fixtures onto finished cabinetry and fishing cable through a finished wall.
In our eight-step process this is settled at the Material Selection and Tailored Design stage, well before the Deposit and Field Measure that starts production.
What It Costs in Charlotte
For a typical kitchen in 2026, expect roughly:
– Under-cabinet LED strip, supplied and installed: $800-$2,500 depending on run length and driver/dimmer specification
– In-cabinet lighting: $150-$400 per glass-front cabinet
– Toe-kick lighting: $300-$700 for a typical run
Electrical work is quoted separately if a new circuit is required. Set against cabinetry at $300-$650 per linear foot for semi-custom, lighting is one of the lowest-cost upgrades with the highest daily impact.
The Short Version
– Under-cabinet: continuous LED strip, front edge, diffuser channel, on a dimmer. Non-negotiable in a working kitchen.
– In-cabinet: glass-front uppers and deep pantries only.
– Toe-kick: cheap during a build, genuinely nice to live with.
– Everything: 2700-3000K, CRI 90+, consistent across the room, separately switched.
Plan It With the Cabinets, Not After
Because we design and build the cabinetry, lighting channels, pass-throughs, and power locations are drawn into the plan before anything is cut. You see it in the 3D rendering and it arrives built in rather than added on.
Bring it up at your free design consultation, even if you are not sure you want it – it costs nothing to draw in and a great deal to add later. We serve Charlotte, Ballantyne, SouthPark, Myers Park, Matthews, Huntersville, Lake Norman, Concord, Waxhaw, Fort Mill, Rock Hill, and surrounding NC/SC communities.
Frequently Asked Questions
What is the best under-cabinet lighting for a kitchen?
Continuous LED strip tape, recessed into a channel at the front edge of the wall cabinet underside, is the best choice for most kitchens. It gives even, shadow-free light across the whole worktop, hides the diode dots behind a diffuser, and disappears visually when switched off. Puck lights are cheaper but produce bright pools with dark gaps, which is why they are the most common source of dissatisfaction.
What color temperature should kitchen cabinet lighting be?
2700K to 3000K for almost every Charlotte kitchen. Use 2700K with warm woods, cream, and greige finishes, and 3000K with white and cooler grey cabinetry. Anything at 4000K or above reads clinical and fights the warm palettes that are current in 2026. The critical rule is consistency – every layer in the room should be the same temperature.
How much does under-cabinet lighting cost in Charlotte?
Roughly $800 to $2,500 installed for a typical kitchen in 2026, depending on the run length, driver and dimmer specification, and whether an electrician needs to add a new circuit. Adding it during a cabinet project is significantly cheaper than retrofitting later, because the channels are routed in the shop and the wiring is run before backsplash goes on.
Should I add lighting inside my cabinets?
Only behind glass doors. In-cabinet lighting looks striking through glass-front uppers and turns a display cabinet into a feature at night. Inside solid-door cabinets it adds cost for something nobody sees, with the exception of a deep pantry, where a door-activated light is genuinely useful.
Can under-cabinet lighting be added after cabinets are installed?
Yes, but the result is usually inferior. Retrofit strips are surface-mounted rather than recessed into a routed channel, so the fixture and its shadow line are visible from a seated position, and the wiring has to be surface-run or fished through finished walls. Planning it at the design stage costs less and looks considerably better.
Is toe-kick lighting worth it?
It is inexpensive to add during a build and most homeowners who have it use it constantly – as a night light for the 2am glass of water, and as low-level ambient light when the kitchen is not in use. It adds no task value, so treat it as a comfort and atmosphere layer rather than a functional one.
Ready to start your cabinet project?
Visit Our Showrooms
We’d love to welcome you to one of our showroom locations. Visit us to explore our cabinetry collections, discuss your project, and experience the craftsmanship that defines FigTree Cabinets.